

There are four (4) steps to successfully adding the BrainStorm Microsoft Teams App to all of your organization's users. This is step one (1).
Step One: Adding Permissions for the BrainStorm Teams App (Globally)
Step Two: Script to Push the BrainStorm Microsoft Teams App
Step Three: Pushing the BrainStorm Teams App to Users (Globally)
Step Four: Pinning the BrainStorm Teams App (Globally)
The BrainStorm Teams App is installed globally to your entire organization via the Microsoft Teams Admin Center.
NOTE: This can only be completed by an O365 Global Admin or a Teams Service Admin.
Giving Permission Globally to All Users
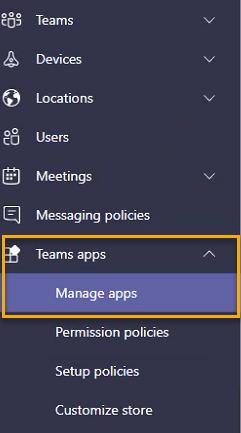
1. Go to the Microsoft Teams Admin Center > Teams app > Manage apps.
2. Search for BrainStorm.

3. Click on the BrainStorm app name.

4. Click Status to be “Allowed”.

5. Click the Review permissions and consent button.

At the top of the Manage apps dialog, you'll see a Subscriptions and licenses section with a Purchase button. You can ignore this option and continue.

6. Click Accept.

7. Click Go to Microsoft Entra ID.
8. Click Grant admin consent for xxxxxx (your organization's name).

9. Go back to Microsoft Teams Admin Center > Teams app.
10. Click Permission policies.

11. Under Microsoft apps set to Allow all apps or Allow specific apps and block all others.
- If set to Allow specific app, select BrainStorm as an allowed app.
12. Click Save.
